Live streaming in SRT with the Aviwest StreamHub
- First, add an input in the LiveU Studio Production studio (1 & 2).
- In the Live source section (3), add an Encoder (Push) input (4).
- In the SRT column, select Aviwest (5).
- Copy the provided Server URL.
- Make sure that your input is correctly enabled on LiveU Studio and that you're in the Testing or Publishing phase.
- Sign in to the Aviwest Streamhub platform with your account.
- Configure your video inputs as usual.
- Go to the Settings tab (A), then in the IP Output Profiles section (B).
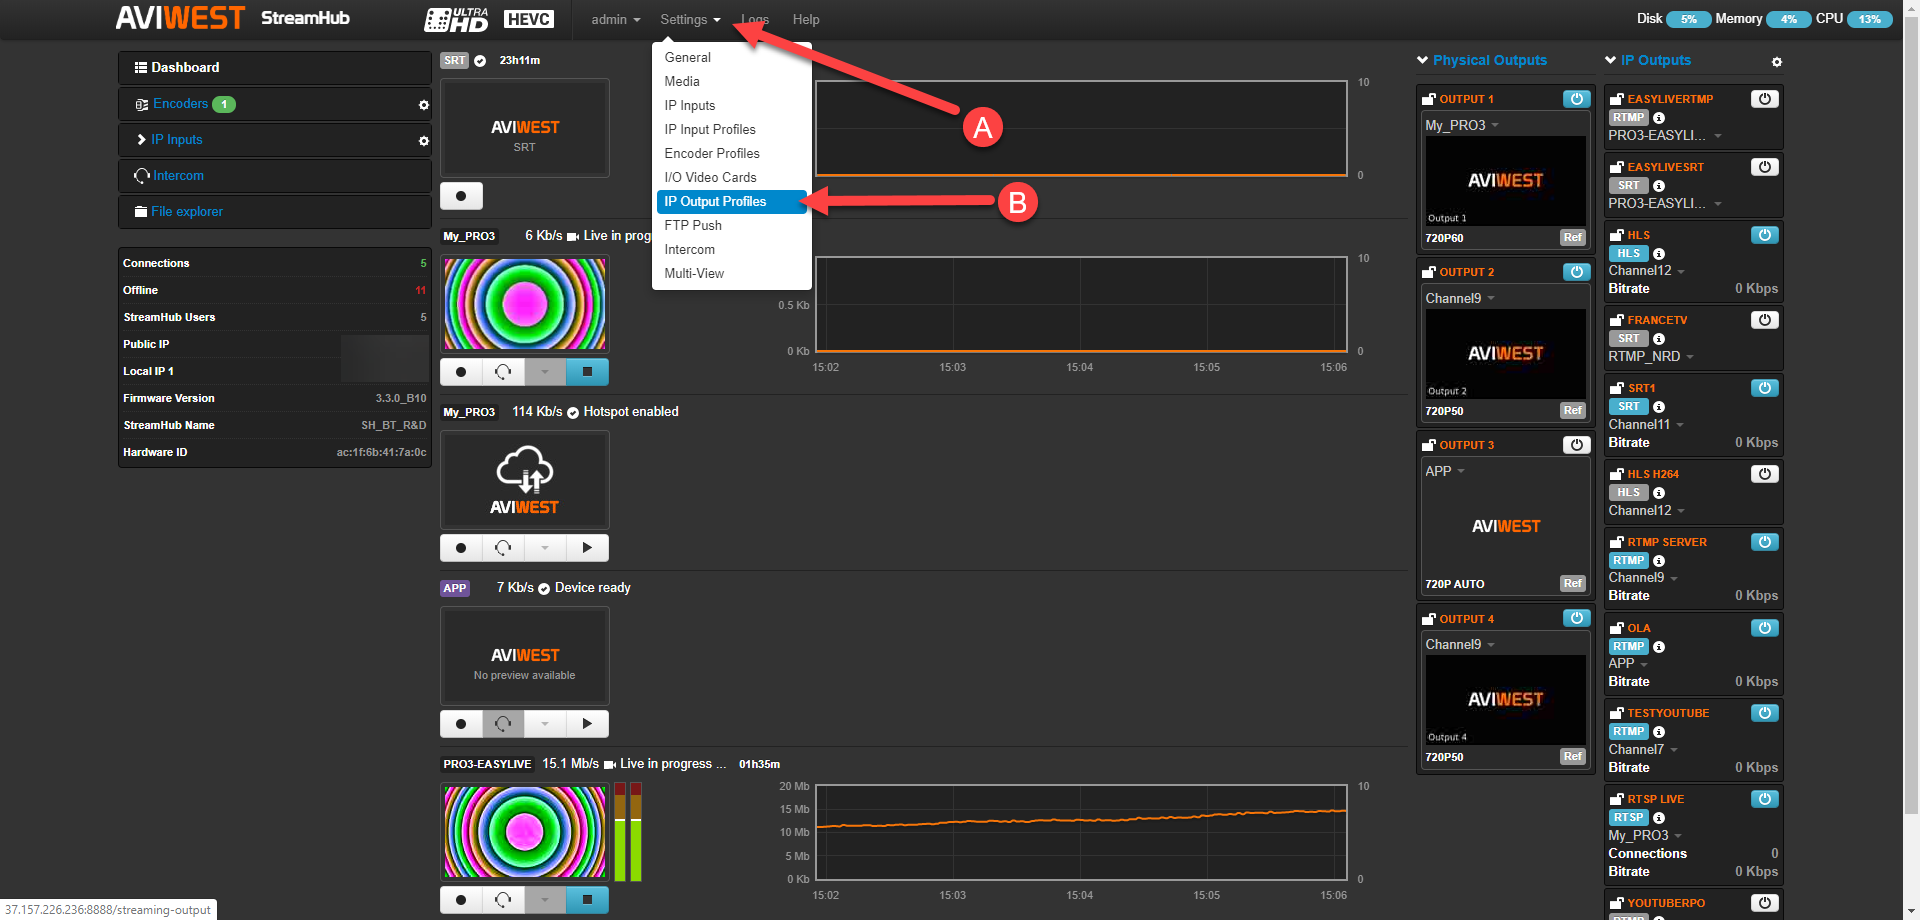
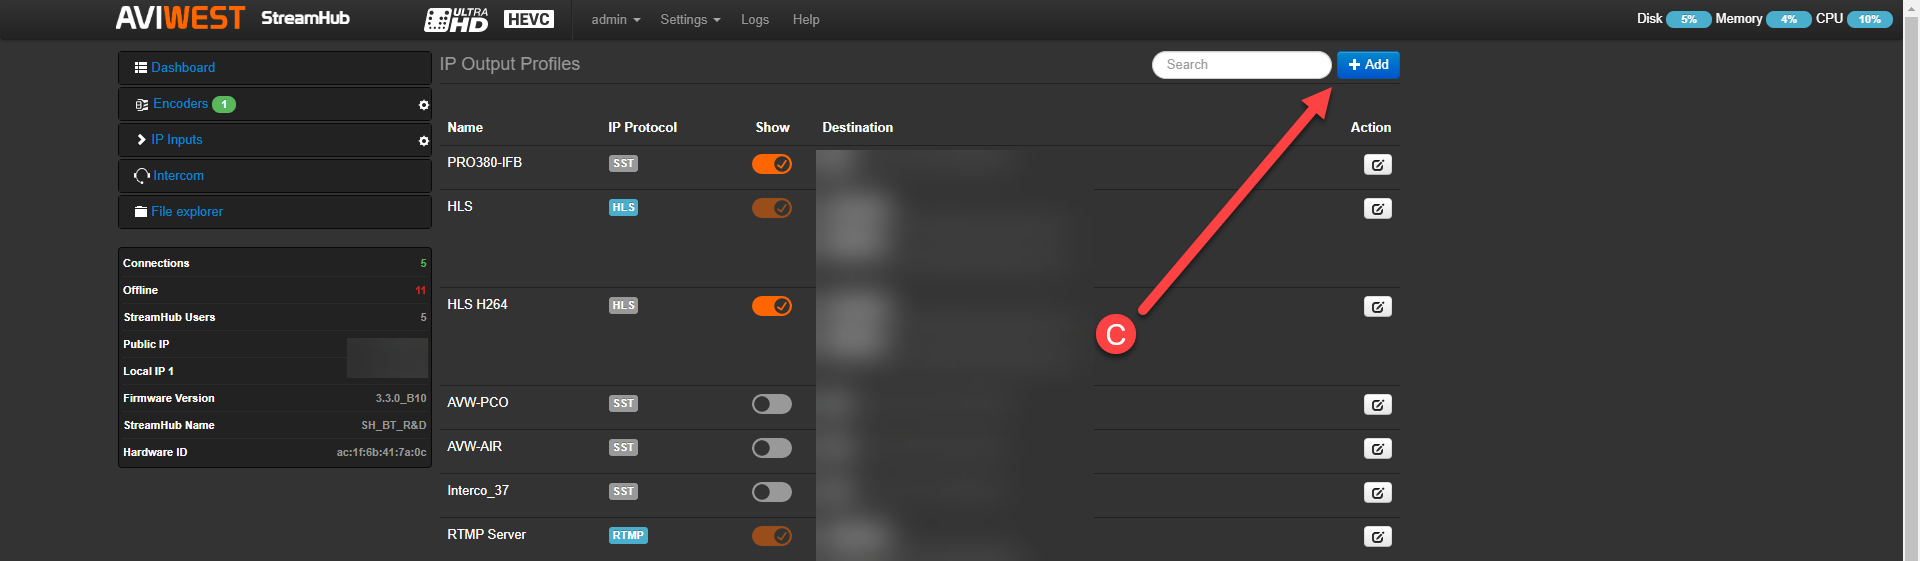
- Add a new IP Output profile (C).
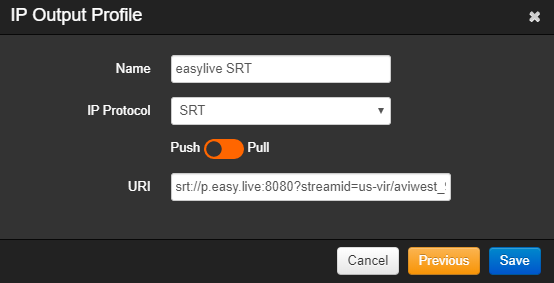
- Select the SRT protocol, in Push mode.
- Paste the Server URL provided previously by LiveU Studio.
- Don't forget to save it!
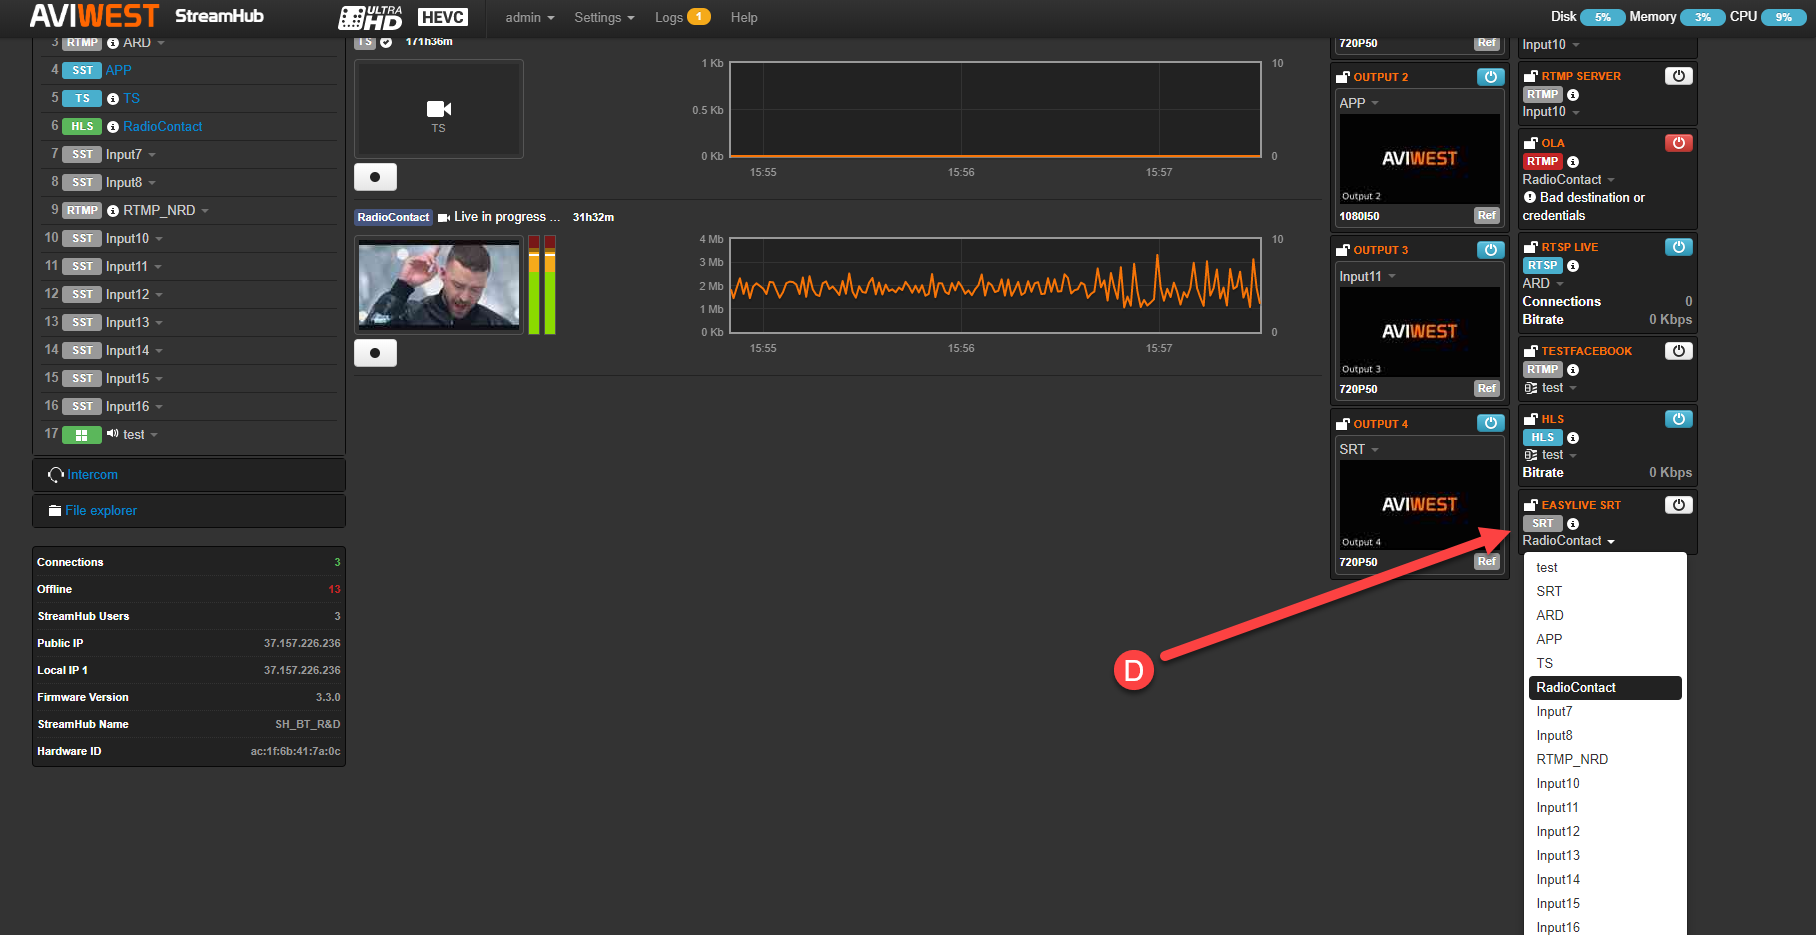
- In your output profile panel at the right, select the input to be sent to LiveU Studio (D).
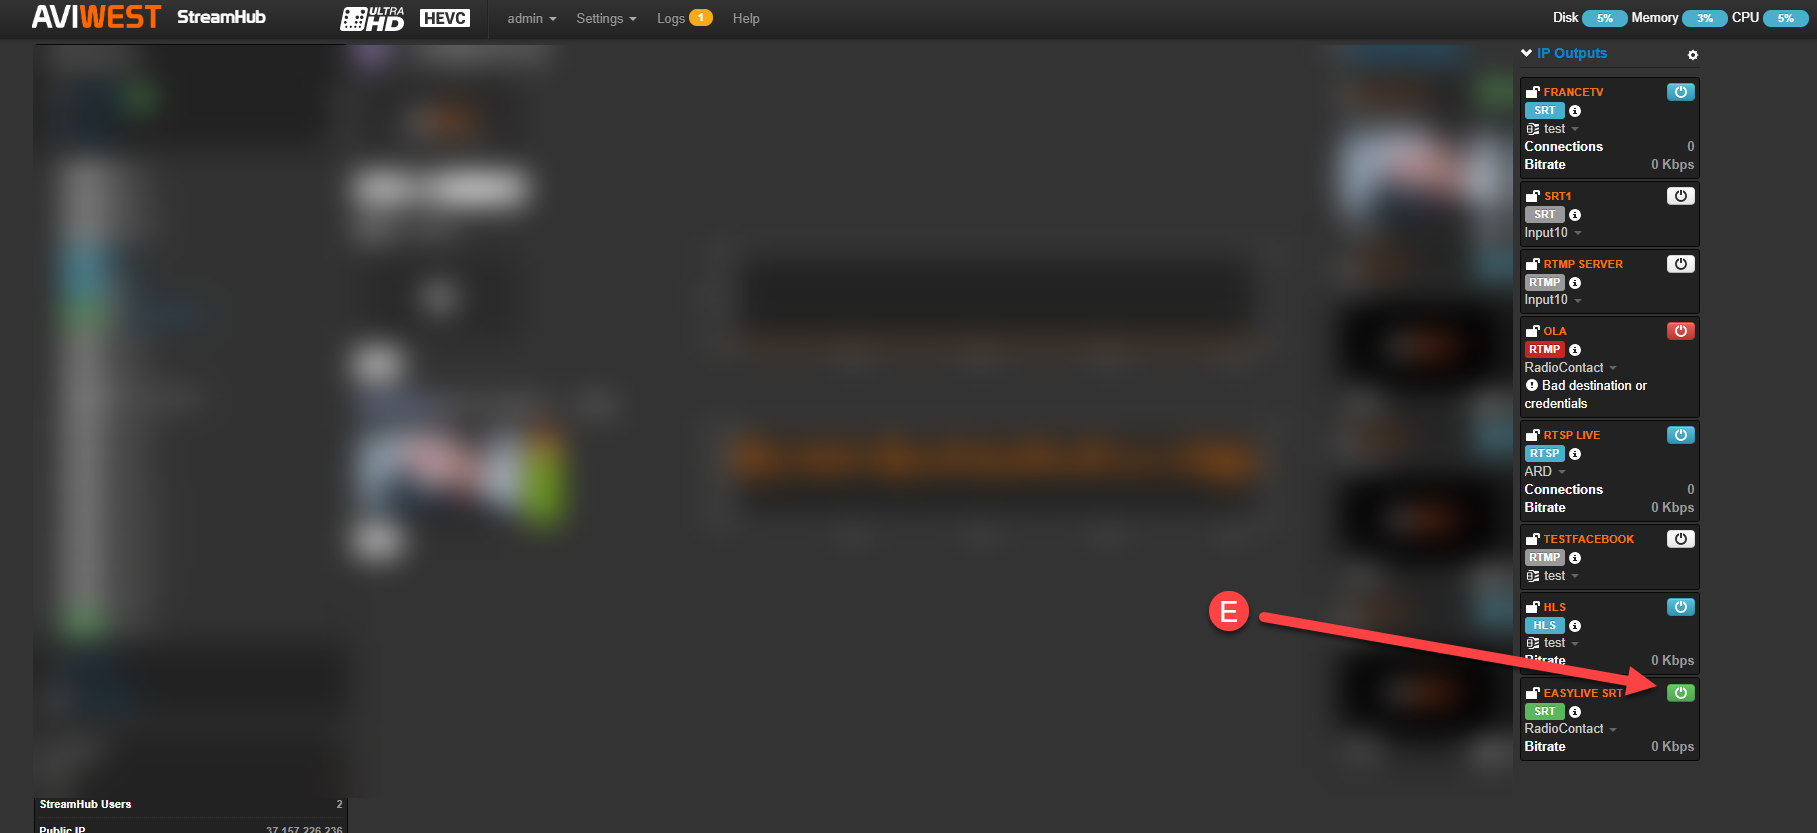
- Start sending your feed to LiveU Studio with the power button (E).
- Let's check on LiveU Studio if the feed is well received.
When ready, Start publishing & record!
Can't find the right answer?
Contact the LiveU Studio Support team via our Live Chat.