Live Streaming with Teradek Vidiu
Teradek Vidiu Quickstart guide
- Go to the LiveU Studio Production Studio (1) and Add an input (2).
- In the Live source section (3), select Encoder (push) (4) -> Teradek (5).
- Copy the provided URL & Stream name.
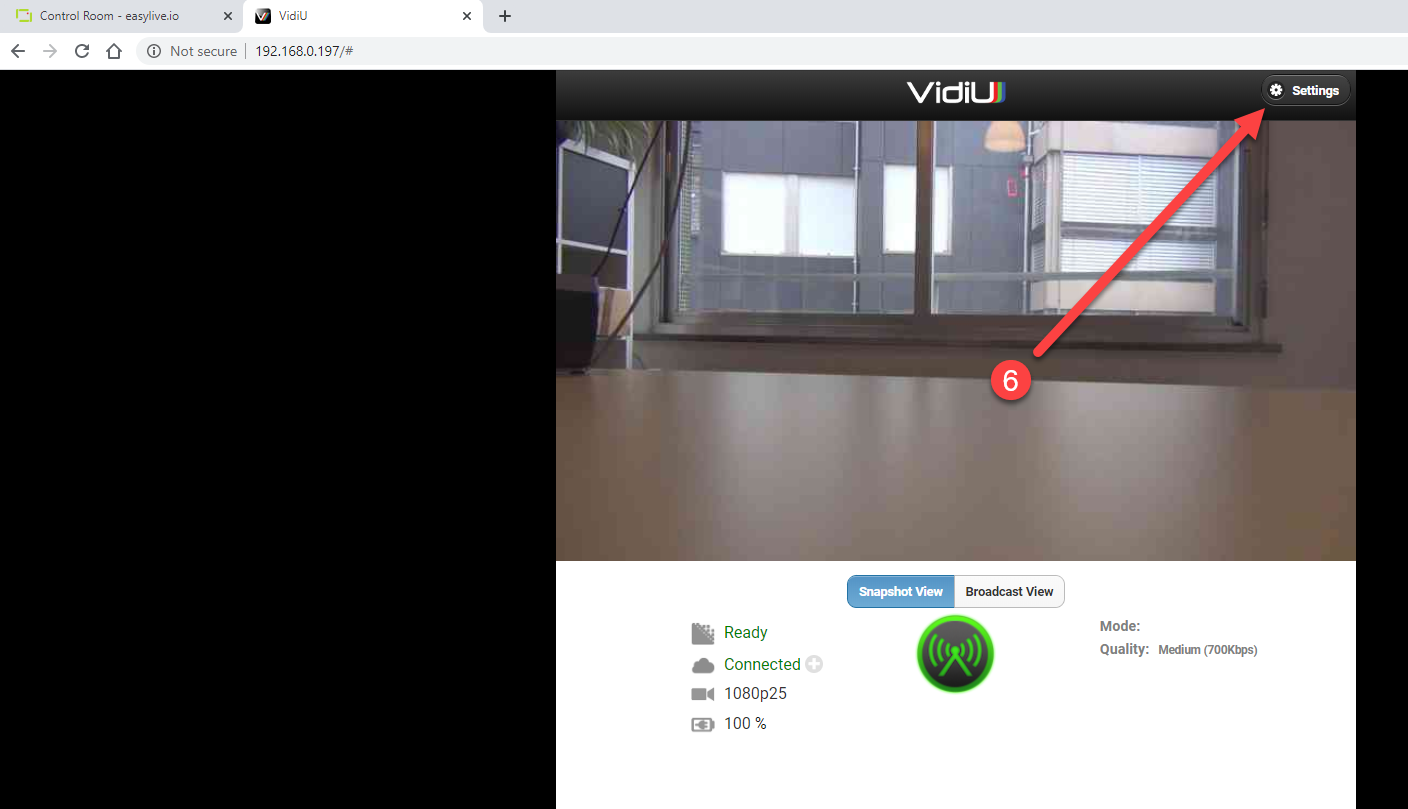
- Open your Teradek Vidiu web interface (open the Vidiu IP in a web browser) and access to the settings (6).
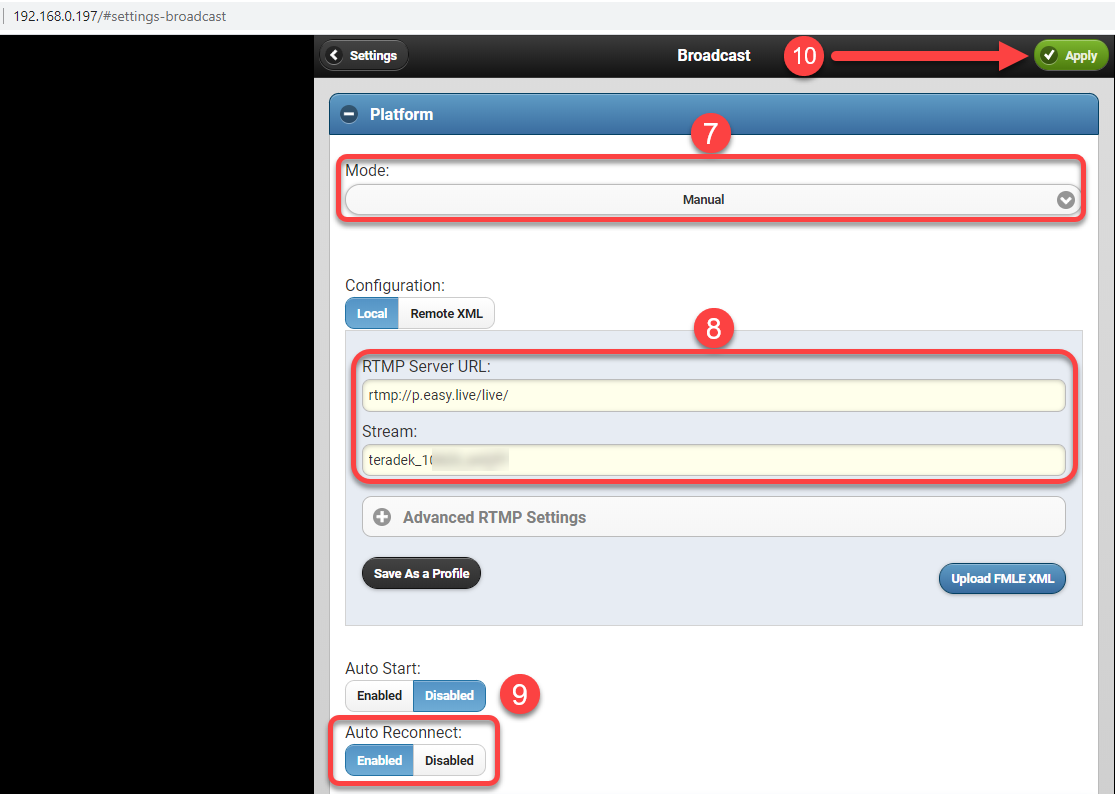
In the broadcast settings (top right):
- Select Mode "manual" (7).
- Copy/paste the server URL/Stream name provided by LiveU Studio (8).
- Enable the "Auto Reconnect" (9).
- Don't forget to "Apply" (10).
- Go live on the Vidiu interface (11).

- On LiveU Studio, enable the input by clicking on it .
-
Start the test to check if the feed is well-received.
- If everything is fine, Start publishing & record.
Don't forget to stop the live with the [END] button!
Can't find the right answer?
Contact the LiveU Studio Support team via our Live Chat.