How to stream from LiveU Studio to Brightcove
Creating a new live event
- Login to Brightcove Studio.
- Open the Live module.
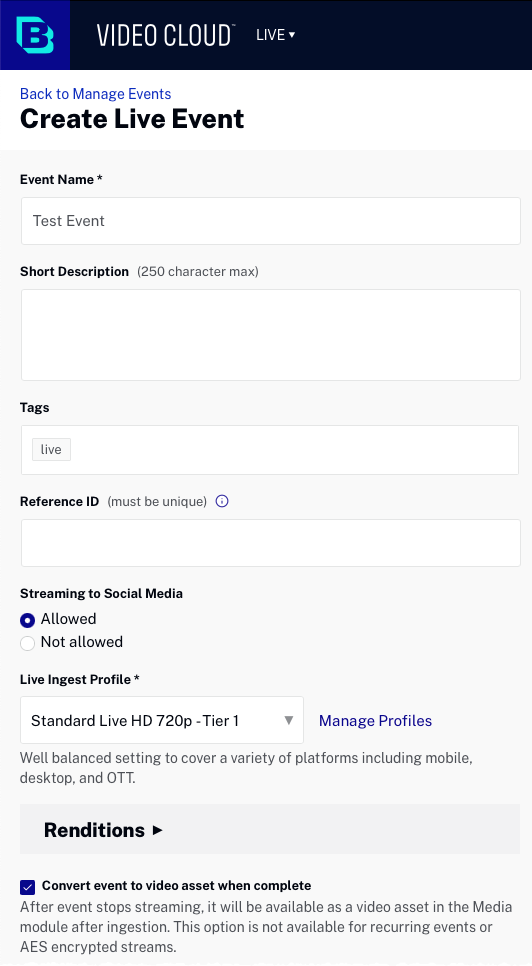
- Click to create a new event.
- Enter an Event Name.
- Enter some Tags for the event.
- If your account has been configured with required custom fields, make sure the custom fields are assigned values.
- Select a Live Ingest Profile from the dropdown list. The live ingest profile controls the number and quality of live renditions that are created.
- Select Convert event to video asset when complete. This will save the event as a video in the Media module.

- Select the Region closest to your location.
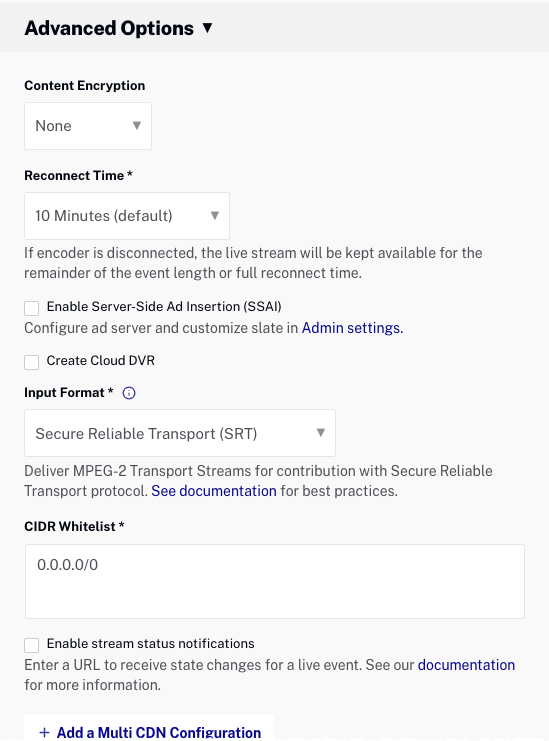
- Click the Advanced Options link to expand the advanced options.
- Set the Reconnect Time to 10 minutes (default).
- For the Input Format, select Secure Reliable Transport (SRT).
- In the CIDR Whitelist section, enter a set of IP addresses that are allowed to connect to the SRT endpoint. This controls who can connect to the SRT endpoints. Note this option will only appear if the Input Format is RTP or SRT. You can specify
0.0.0.0/0to allow all networks. To allow specific IP addresses, use{IP address}/32(example: 255.160.10.1/32).
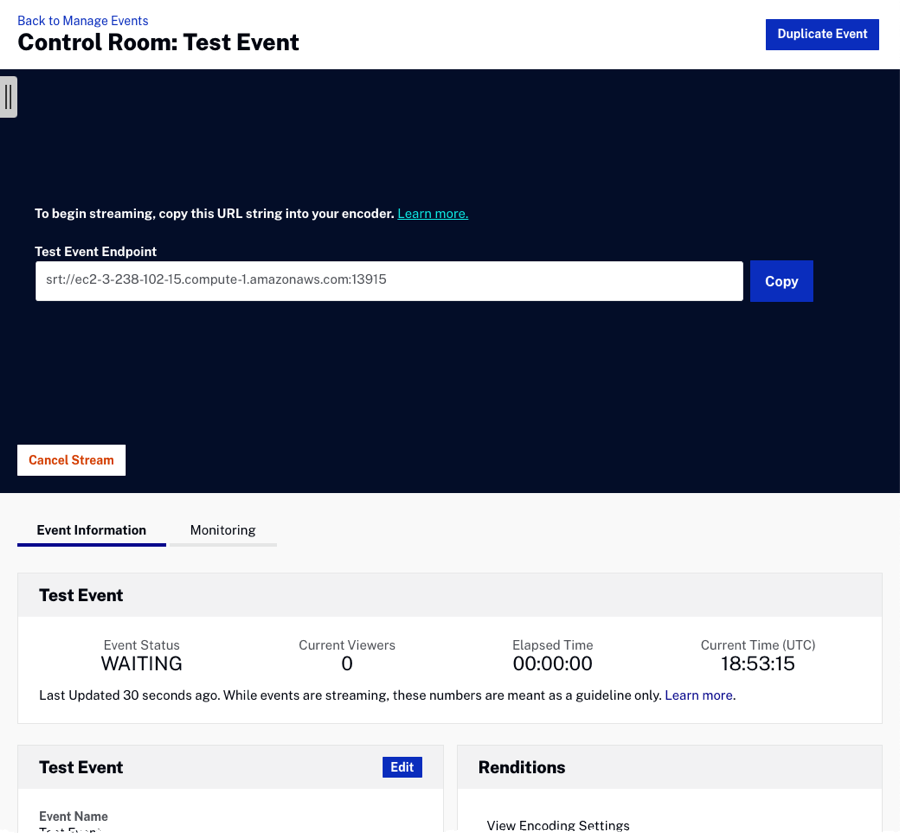
- Click Start Streaming. The Live module will return a Stream Endpoint (SRT URL). The SRT URL will be used in the encoder settings.

Configuring LiveU Studio
- Login LiveU Studio.
- In the Publishing panel (1) -> Add a new publishing point (2).
- Select SRT (3) -> Add publishing point (4).
- Paste the Hostname/port provided by Brightcove.
- Select the destination point.
When ready, start Publishing & recording.