Stream to AWS Elemental MediaLive in RTP
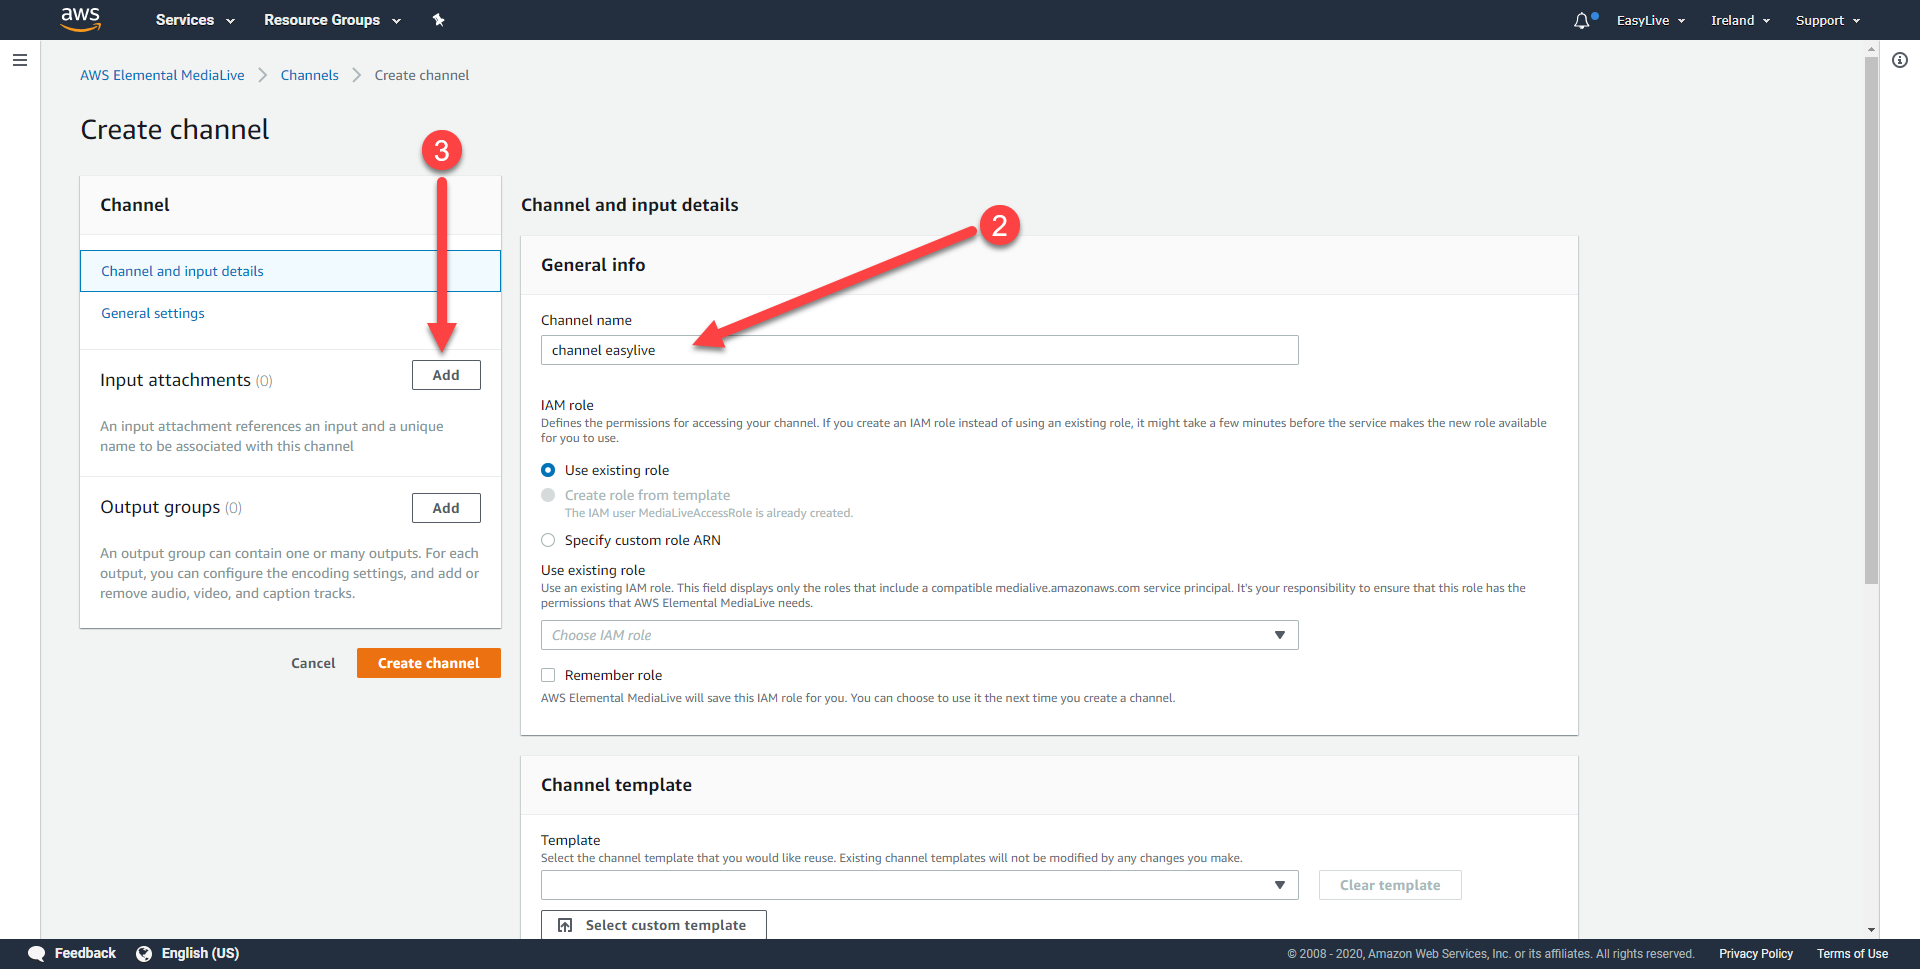
- Login to AWS MediaLive and "Create a new channel" (1)(or edit your existing channel).

- Set your channel name (2).
- Add "Input attachments" (3).
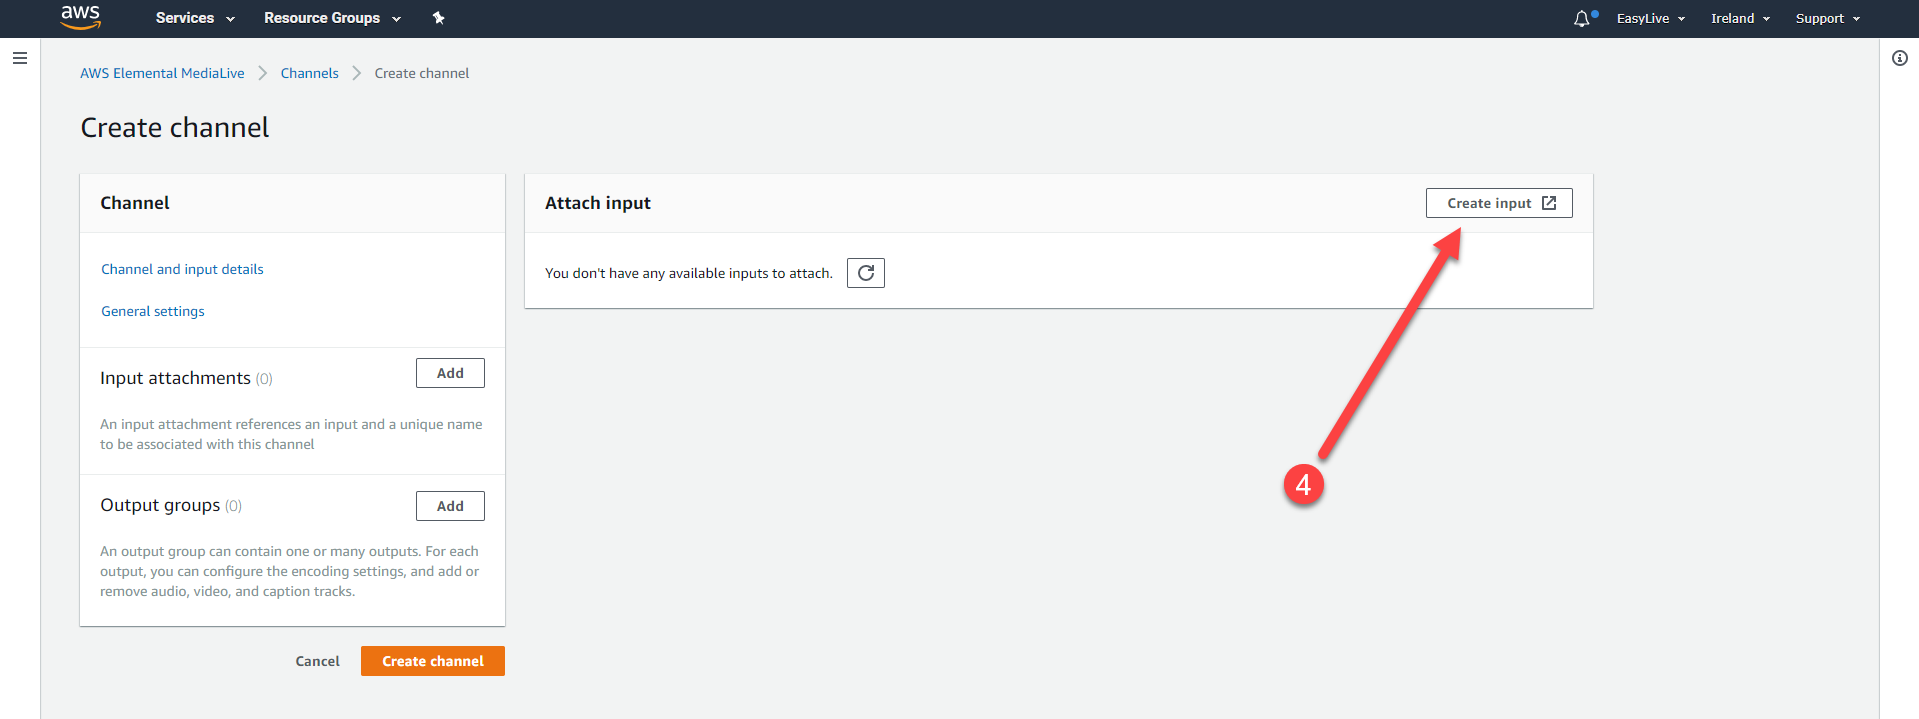
- Click on "Create Input" (4).
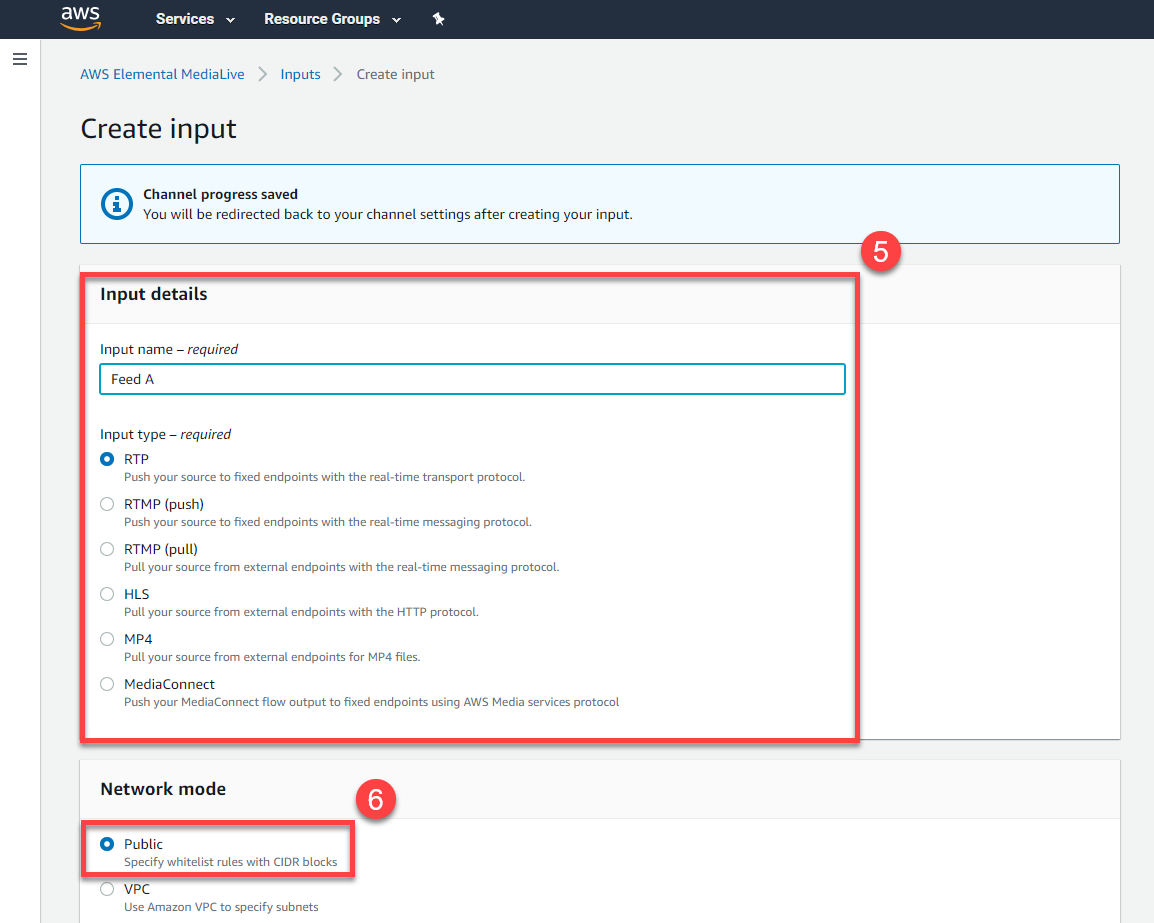
- Setup your Input name and type (5).
- In-Network mode, select "Public" (6).
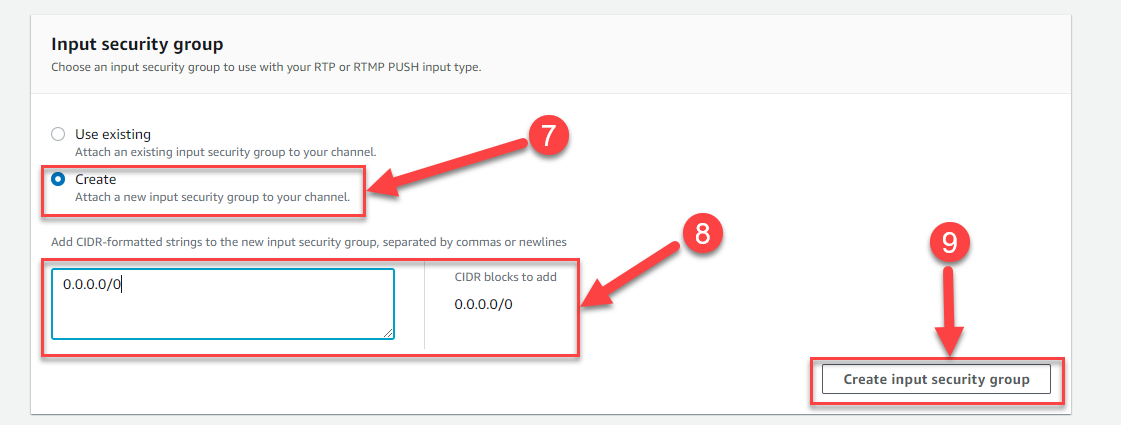
- In the Input security group, select "Create" (7).
- Set 0.0.0.0/0 as CIDR block (8).
- Click on "Create security group" (9).
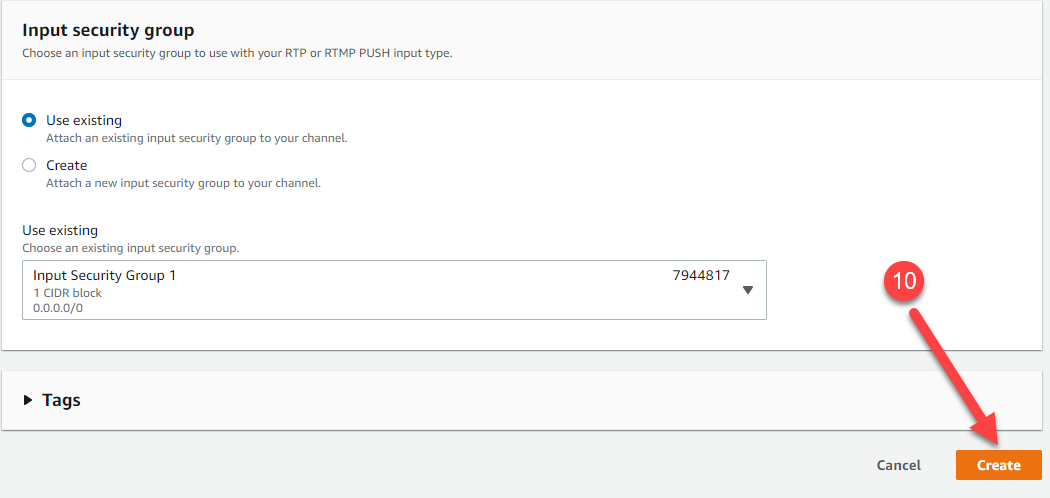
- Select the created security group and click on "Create" (10).
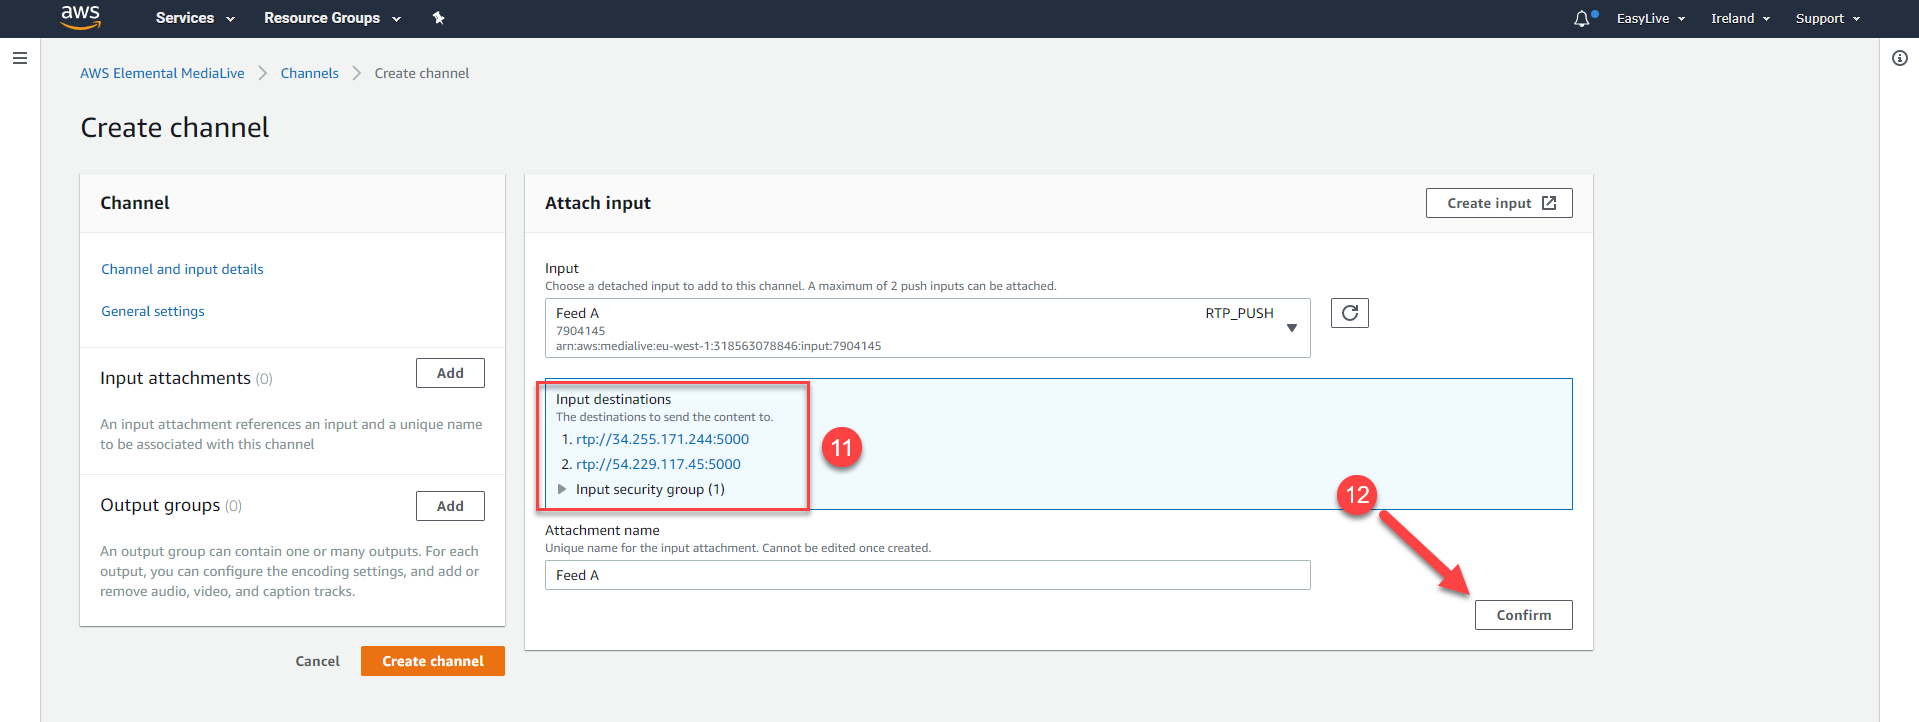
- Copy the RTP destinations links (11).
- Confirm (12).
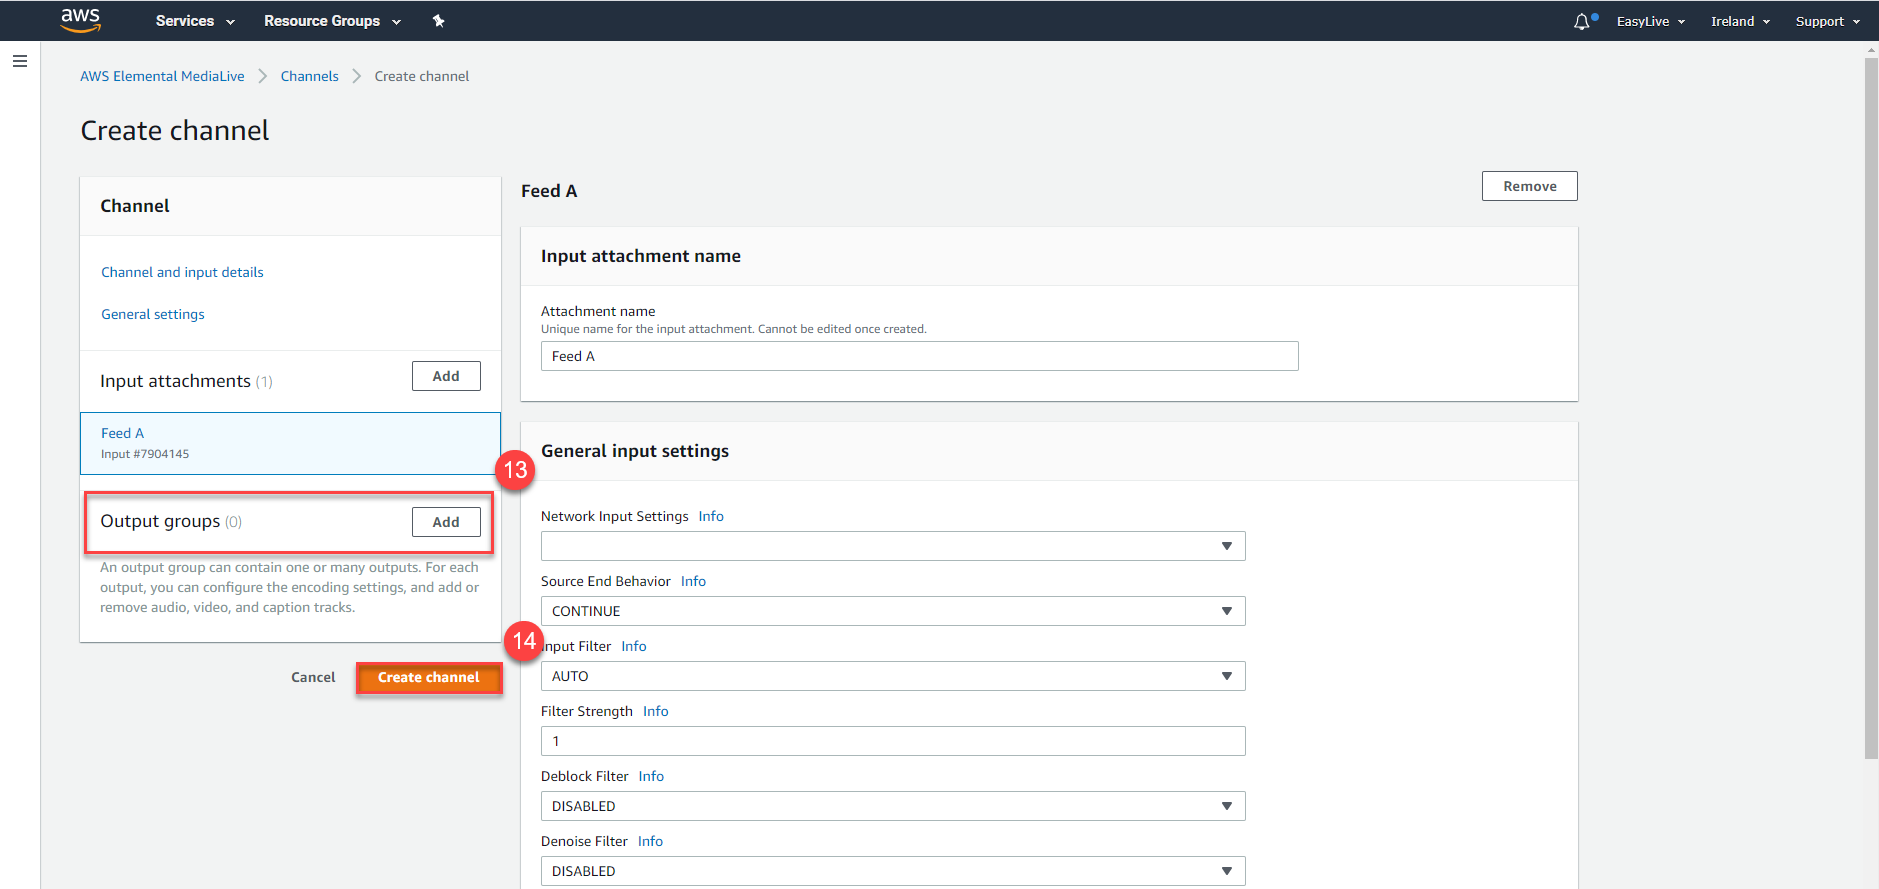
- Setup your output (13).
- Validate the creation of the channel with "Create channel" (14).
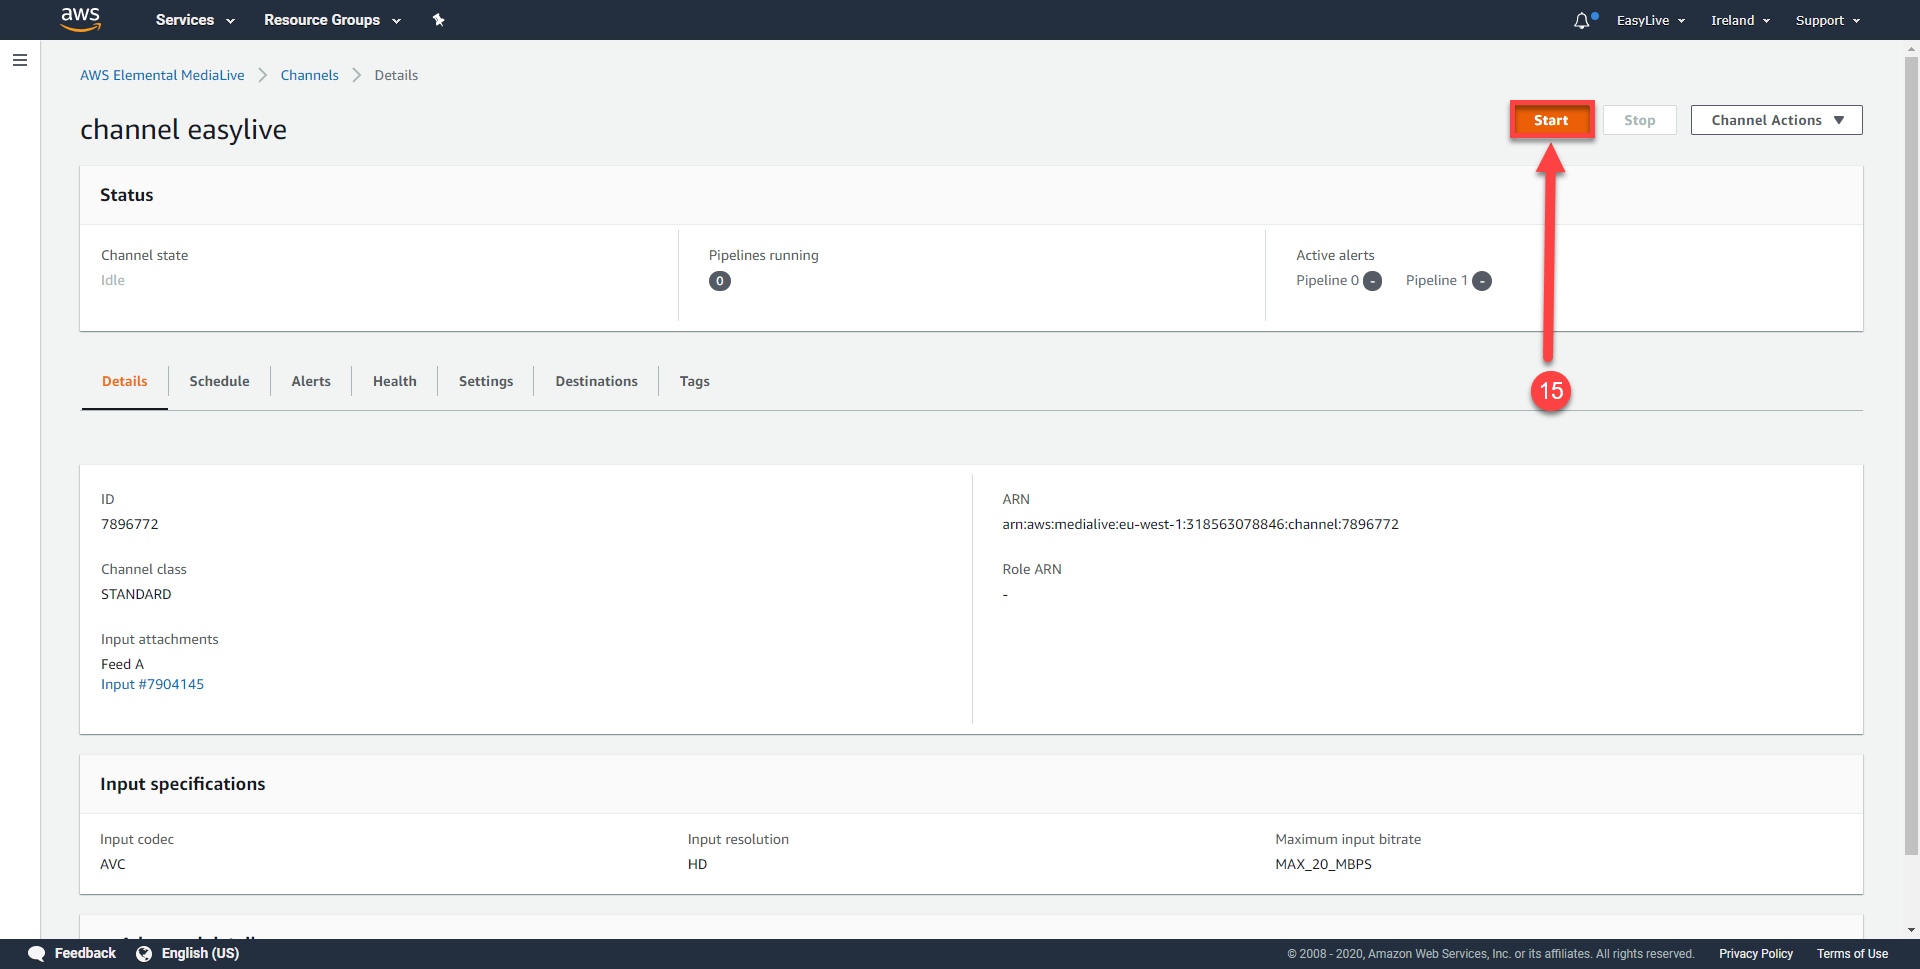
- Start your channel on AWS (15).
- On LiveU Studio live event, in the Publish section.
- Add or edit a publishing point (16).
- In the MPEG-TS section.
- Add a publishing point.
- Select "MPEG-TS over RTP".
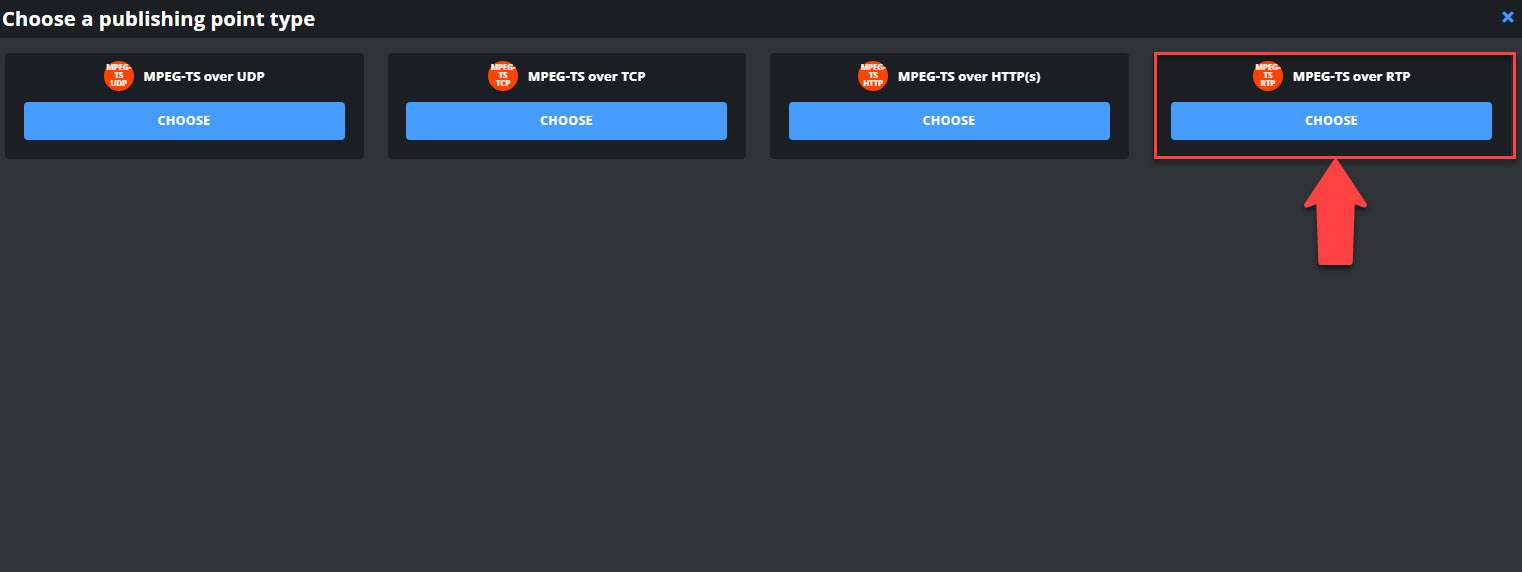
- Paste the RTP destinations points previously provided by AWS MediaLive (available in the AWS "Inputs" tab).
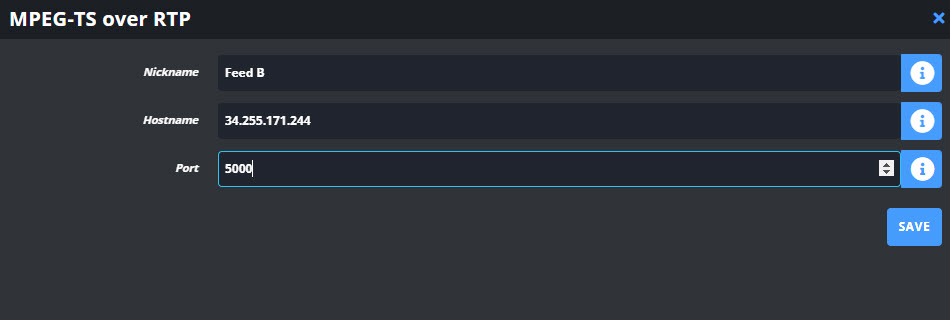
- Repeat the operation with the second destination point.
- Select the created publishing points.
- If you're ready to start streaming, click on Start publishing & record on LiveU Studio.
Your stream is now sent to your AWS MediaLive RTP entry point.
Can't find the right answer?
Contact the LiveU Studio Support team via our Live Chat.