How to stream to Dolby Optiview using Whip protocol
If you're looking to stream from LiveU Studio to Dolby Optiview in Whip, it's important to understand the steps involved. This support article will guide you through the process step by step.
Configure Dolby Optiview and retrieve your WHIP URL
-
Create a Dolby Optiview (Millicast) account First.
-
Go to the "Live Broadcast" (Streaming dashboard) (A) and click on "CREATE" (B) or enter the setting panel of an existing broadcast. Fill in the necessary information and click on "confirm" to finish.
Once you've created a new live broadcast, click on the newly created Token.
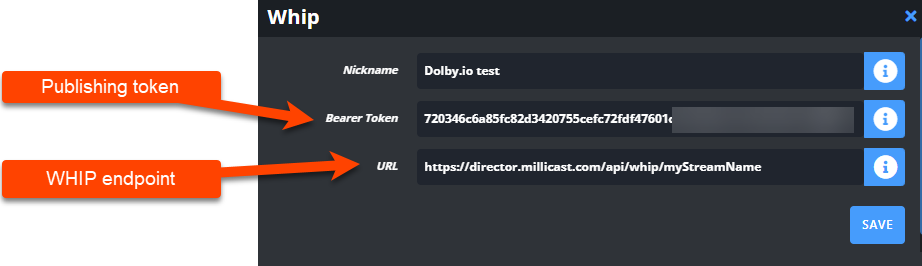
- You'll find the WHIP endpoint and Publishing token in it's Publishing section (C).
- Copy both of these values (D).
Configure LiveU Studio to stream to Dolby Optiview
-
Open LiveU Studio and go to the "Publish" section (1). Click on "Add a publishing point" (2).
-
Select "Whip" (3) from the menu and add a publishing point (4).
-
Paste the WHIP endpoint and Publishing token (E) that you obtained from Dolby Optiview into the appropriate fields.
- Save the publishing point and select it.
- Select the output bus you want to send to your Whip endpoint (from P1 to P4).
- Start testing from LiveU Studio.
- Start publishing from LiveU Studio to Dolby Optiview.
That's it! You are live on Dolby Optiview using LiveU Studio.
Attention: We recommend to publish with a max bitrate of 4mbps.
A bitrate of 4Mbit/s up to 6Mbit/s may cause instabilities or artifacts, above 6Mbit/s problems will be visible and/or your stream will not start.
Can't find the right answer?
Contact the LiveU Studio Support team via our Live Chat.