How to enable the screen sharing for my remote guests?
The screen sharing mode will give you the ability to share what you are displaying on your screen with the audience or host during a presentation.
It is very useful when you are planning to do a remote presentation during a live event or webinar.
Also to teach for student or pro.
By default the screen sharing option is not enabled for your remote guests.
In order to enable it you have to :
- If not already done, in the Production, add the number of remote guests desired.
- Go to the guest configuration interface (A&B).
- Select from the list the guest to which you want to enable the screenshare option (C).
- Check the Allow screensharing button (D).
Please note that the template inputs are in 360p by default, which can affect the screensharing display. For optimal screensharing we recommend to select 720p.
- Don't forget to Apply new changes (E).
- This will create an input named "Name_of_guest-screenshare" in your Production studio (F), so you can choose to display the webcam and/or the screen share of your guest.
Remote guest
Send this cheat sheet to your remote guests
- Open the previously sent link
PC, Mac, Linux users, please use Google Chrome.
Ipad (IOS) users, please only use Safari.
Please note that we recommend the following bandwidths depending on the desired sending quality:
- 0.5 Mb/s to stream in the minimum required quality.
- 1.5 Mb/s to stream in 480p SD.
- 2.5 Mb/s to stream in 720p HD.
- 4 Mb/s to stream in 1080p HD.
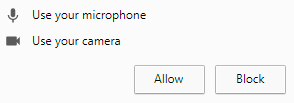
If needed, allow LiveU Studio to use the devices' microphone/camera.

- When ready to stream, simply click on Start & join.
- Once connected, your guest will be able to share his screen via the screenshare button (7).
- Return to the LiveU Studio platform to check if the stream is received.
Can't find the right answer?
Contact the LiveU Studio Support team via our Live Chat