LiveU Studio supports the SKAARHOJ Waveboard as a third-party controller for audio mixing. The Waveboard provides tactile control over input faders, output bus faders, and audio actions, allowing operators to mix audio accurately and efficiently during live productions.
Prerequisites
Before using the Waveboard with Studio, ensure that your panel is installed following the User manual.
Pairing the panel
Create a new Studio event & open it's settings panel (1).
Click on the Hardware sub-menu (2) and then select Skaarhoj Wave board (3).
-
Check the "Connection Details" section (4).
Cloud region - Should display the current region of your project.
Device code - Your personal device code, if empty, click on the Generate button.
Go to the Wave board control interface.
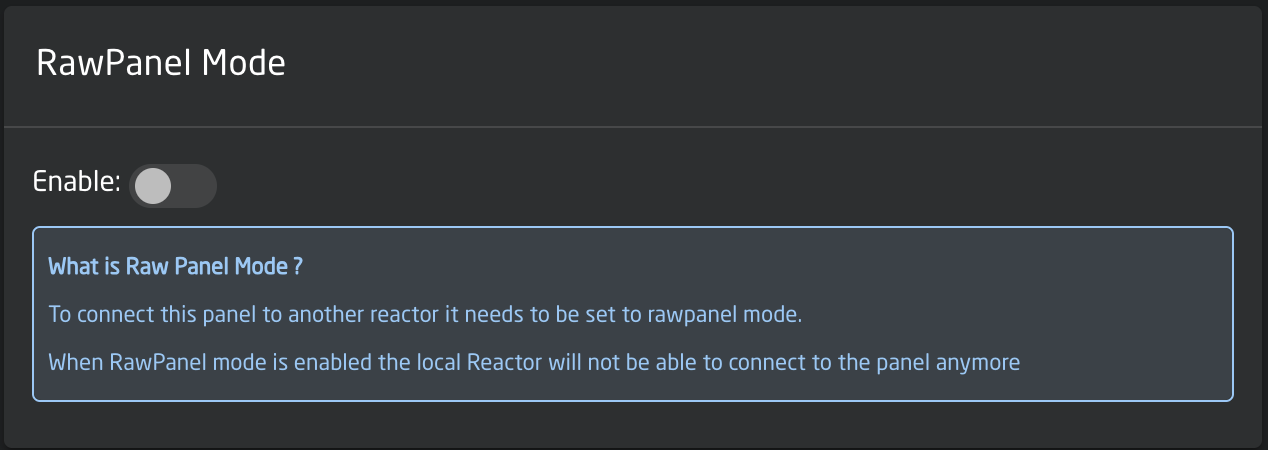
Set the panel in "RawPanel Mode" from the Setting Page.
Go to the "Packages" tab.
From the Packages tab, search for the RWP Bridge package/Raw panel bridge and click on the "Open UI" button.
-
From the Remote Type drop-down select Plain Websocket.
Fill in the Websocket URL field with:
wss://ws-{cloudRegion}.studio.liveu.tv/websocket/public/skaarhoj/{deviceCode}/
-
Fill in the URL/Client ID/Client secret with the "Cloud Region" value from Studio UI and the "Client Secret" with the Device Code then save the configuration.
After a while, the Device Status in Studio UI will show CONNECTED. You can now start using your panel to control the studio audio mixer.
Supported Audio Controls
The following audio mixer functions can be mapped to the Waveboard:
Faders
Input channel volume
Output bus volume
Left / Right stereo pan per input or bus
Button Actions
Mute
Listen (Solo / PFL)
Force (override audio state)
Each control can be mapped to a specific input channel or output bus.
Button Lighting Rules
Button lighting provides immediate audio state feedback:
If a function is assigned to a button it will light the LED on the panel ORANGE
-
Mute
Active: Red
-
Listen (Solo / PFL)
Active: Blue
-
Force
Active: Red
-
Pages
Available pages : White
Selected page: Orange