Import file(s) from my AWS S3 bucket into LiveU Studio
- Create a new AWS S3 Bucket.
- Set the S3 Bucket permissions to public access.
- Find the public URL of an S3 Bucket Object
- Import file(s) from my AWS S3 Bucket to LiveU Studio.
1. CREATE A NEW AWS S3 BUCKET
- Sign in to Amazon Web Services and go to your S3 Management Console.
- Create a new bucket.
- New buckets' permissions are set to “Block all public access”. You can uncheck that option and create the bucket.
2. SET THE S3 BUCKET PERMISSIONS TO PUBLIC ACCESS
Once back to the S3 Bucket's list, you’ll see that the access for that bucket has now been changed to “Objects can be public".
 It is possible to go further by setting the entire content of a Bucket (existing and new) public.
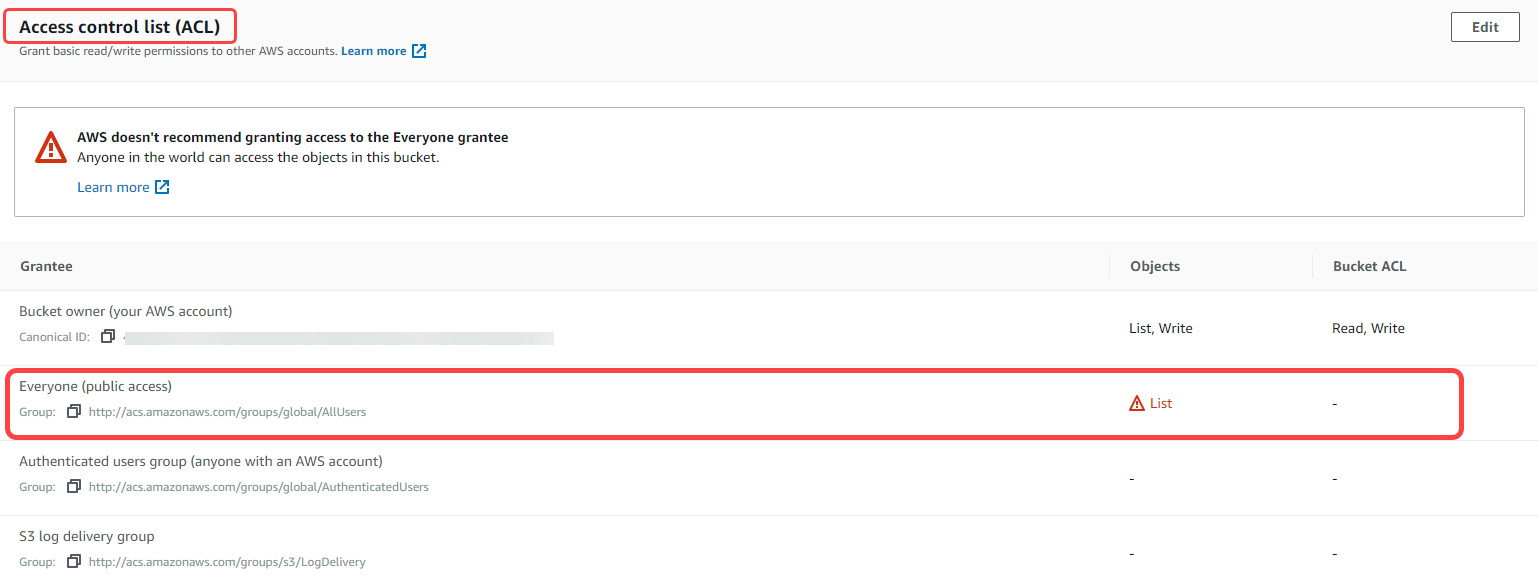
If you proceed, everyone with the link and an Internet connection will be able to read and download your files.
- From the bucket list, click on the bucket name. Select the Permissions tab.

- Edit the Acces control list (ACL) and allow everyone to access the object.
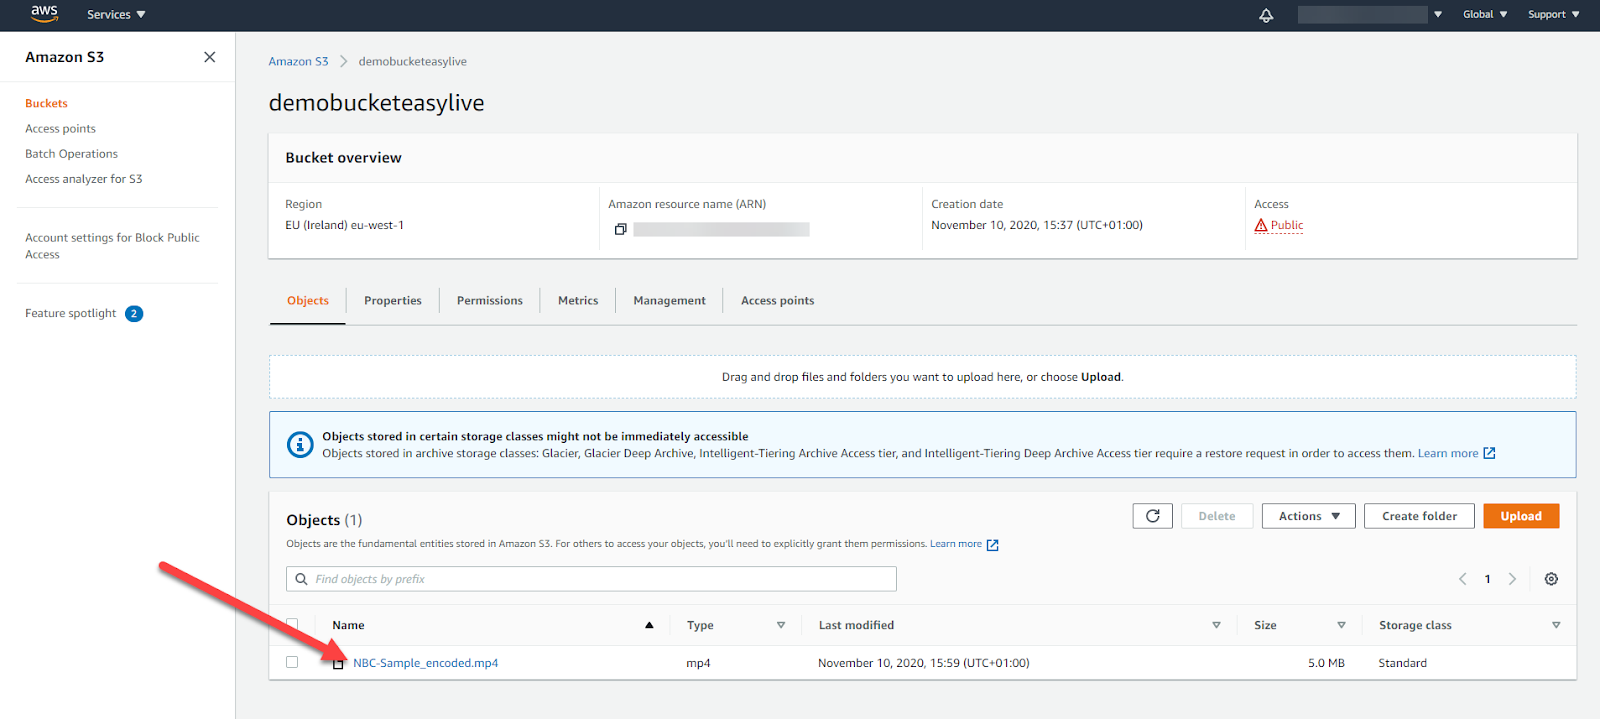
 Now, when you go back to the bucket list, you’ll see that the entry in the access column has changed to Public

3.FIND THE PUBLIC URL OF AN S3 BUCKET OBJECT
- From the bucket list, click on the name of the bucket. Then choose a file and click on its name.

- Copy its Object URL. Make sure that public permissions have been granted.

4. IMPORT FILE(S) FROM MY AWS S3 BUCKET TO LIVEU STUDIO
- Add a new input from URL (image and/or VOD) & paste the objects' URLs or the buckets' URLs. You can paste one or many URLs at the same time, depending on your needs.
If a file cannot be loaded on LiveU Studio, please check if the object's permissions have been settled to "public".
Can't find the right answer?
Contact the LiveU Studio Support team via our Live Chat.