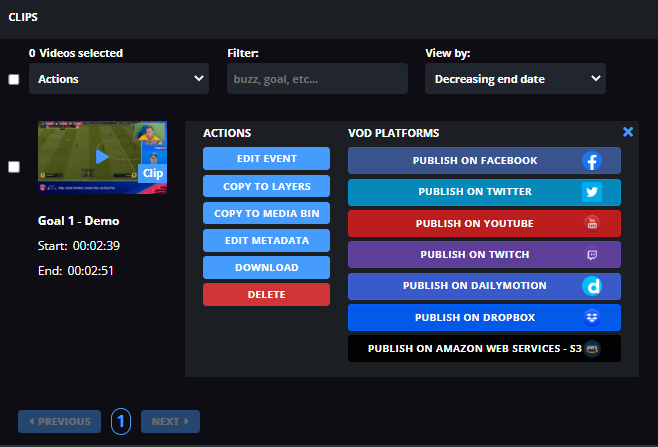
Clips and segments are short extracts from your live that you can cut during the live or in post-production.
Your clips and segments can also be published instantly to all your social networks.
Making clips and segments will allow you to:
- Highlight the best moments of your live session.
- Share short video format on social media.
- Make your community want to attend your next live event (teasing).
- Re-use your clips and segments in your LiveU Studio production studio.
To know how to make your clips and segments it's very simple, just follow the instructions below:
- Create a new live or enter a control room (1 or 2).
- Check that you currently publishing & recording (3).
- Go to the Recording (4) section on the left of your control room, you will be redirected to the Clip and Segments management interface.
Now you can see the current live preview on the right side of the screen, on the left side you can start and manage your clips and Segments.
SEGMENTS
A segment is a cut part of a live, made via the Add a segment button.
- Enter a segment name.
- Start your segment and click Stop once you are done.
- Your segment will automatically be added to the events list.
You can then:
- Edit the event to change its duration, etc.
- Publish the event on the broadcasters of your choice
- Add the event to your Media Bin/layers so you can use it as a live source
- Download/delete the event (important note: backups, as well as clips and segments, are saved for a maximum duration of 48 hours).

If you want to edit a segment duration after his creation, just click on "edit event", the editor will open and you can adjust the duration of it.
Congratulations! You now know how to use the LiveU Studio segment function.
Keep exploring
Can't find the right answer?
Contact the LiveU Studio Support team via our Live Chat.